Calculating Tips
Calculating Tips Revision
Calculating Tips
This page explains some of the basic skills involved in using a scientific calculator. Familiarising yourself with these 7 skills will help you simplify some difficult calculations.
Note:
We will be referring to specific buttons that appear on common models of scientific calculators, but your scientific calculator may have slightly different buttons depending on the manufacturer and model. However, most scientific calculators have very similar features, so some of these skills should still apply.
Skill 1: Converting Answers between Forms
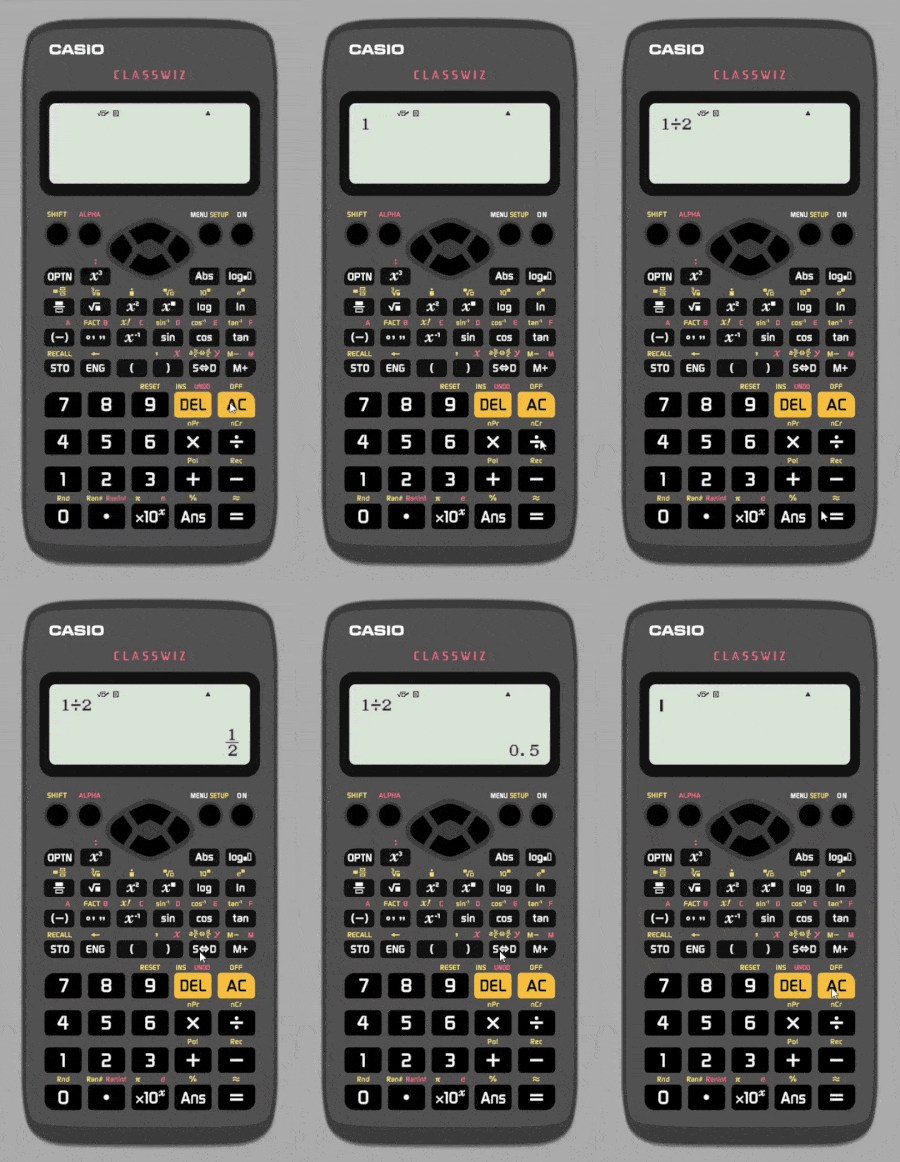

Your scientific calculator will always display answers in exact form, so it will often display an answer as a fraction or a root instead of a decimal.
The \color{black}{\text{S}\Leftrightarrow\text{D}} button allows you to convert your answers between the different forms.
In the example on the right, we entered the calculation \color{black}{1\div2=}
The calculator displays the answer as \color{black}{\dfrac{1}{2}}, so we need to use the \color{black}{\text{S}\Leftrightarrow\text{D}} button to display the decimal equivalent, which is \color{black}{0.5}
The \color{black}{\text{S}\Leftrightarrow\text{D}} button is extremely useful – make sure you are comfortable using this feature by experimenting with different fractions.
Skill 2: Squared Numbers and Square Roots
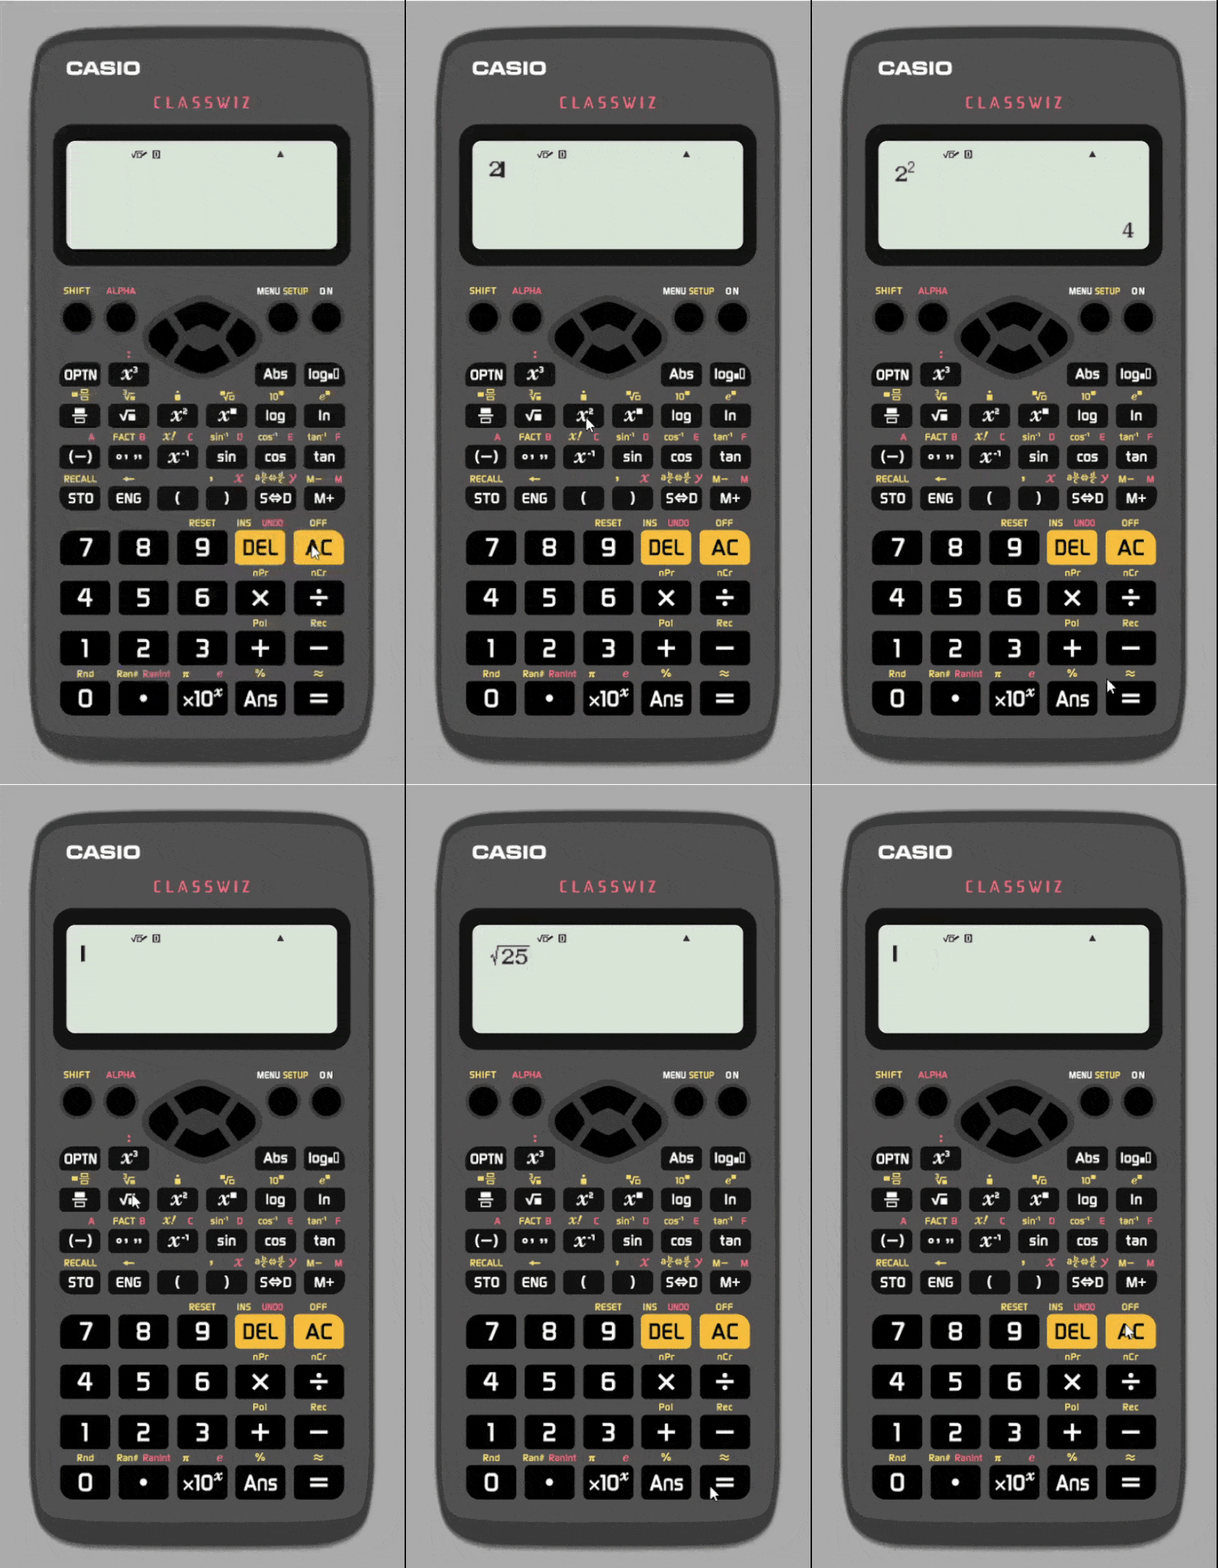

You will encounter square numbers and square roots throughout KS3 maths. We can perform calculations involving powers and roots using a scientific calculator.
To square a number (i.e. a number multiplied by itself), we can use the \color{black}x^2 button. This will insert a superscript \color{black}^2 directly after the number that appears in the display. Pressing \color{black}= will perform the ‘square’ operation.
To square root a number, we can use the \color{black}{\sqrt{\square}} button. Pressing the button allows you to type a number underneath the square root symbol. Pressing \color{black}= will perform the ‘square root’ operation on the number you type in.
In the example on the right, we perform two calculations:
- First, we perform the calculation \color{black}2^2= which gives an answer of \color{black}4
- Next, we perform the calculation \color{black}{\sqrt{25} = } which gives an answer of \color{black}5
Skill 3: Cubed Numbers and Cube Roots
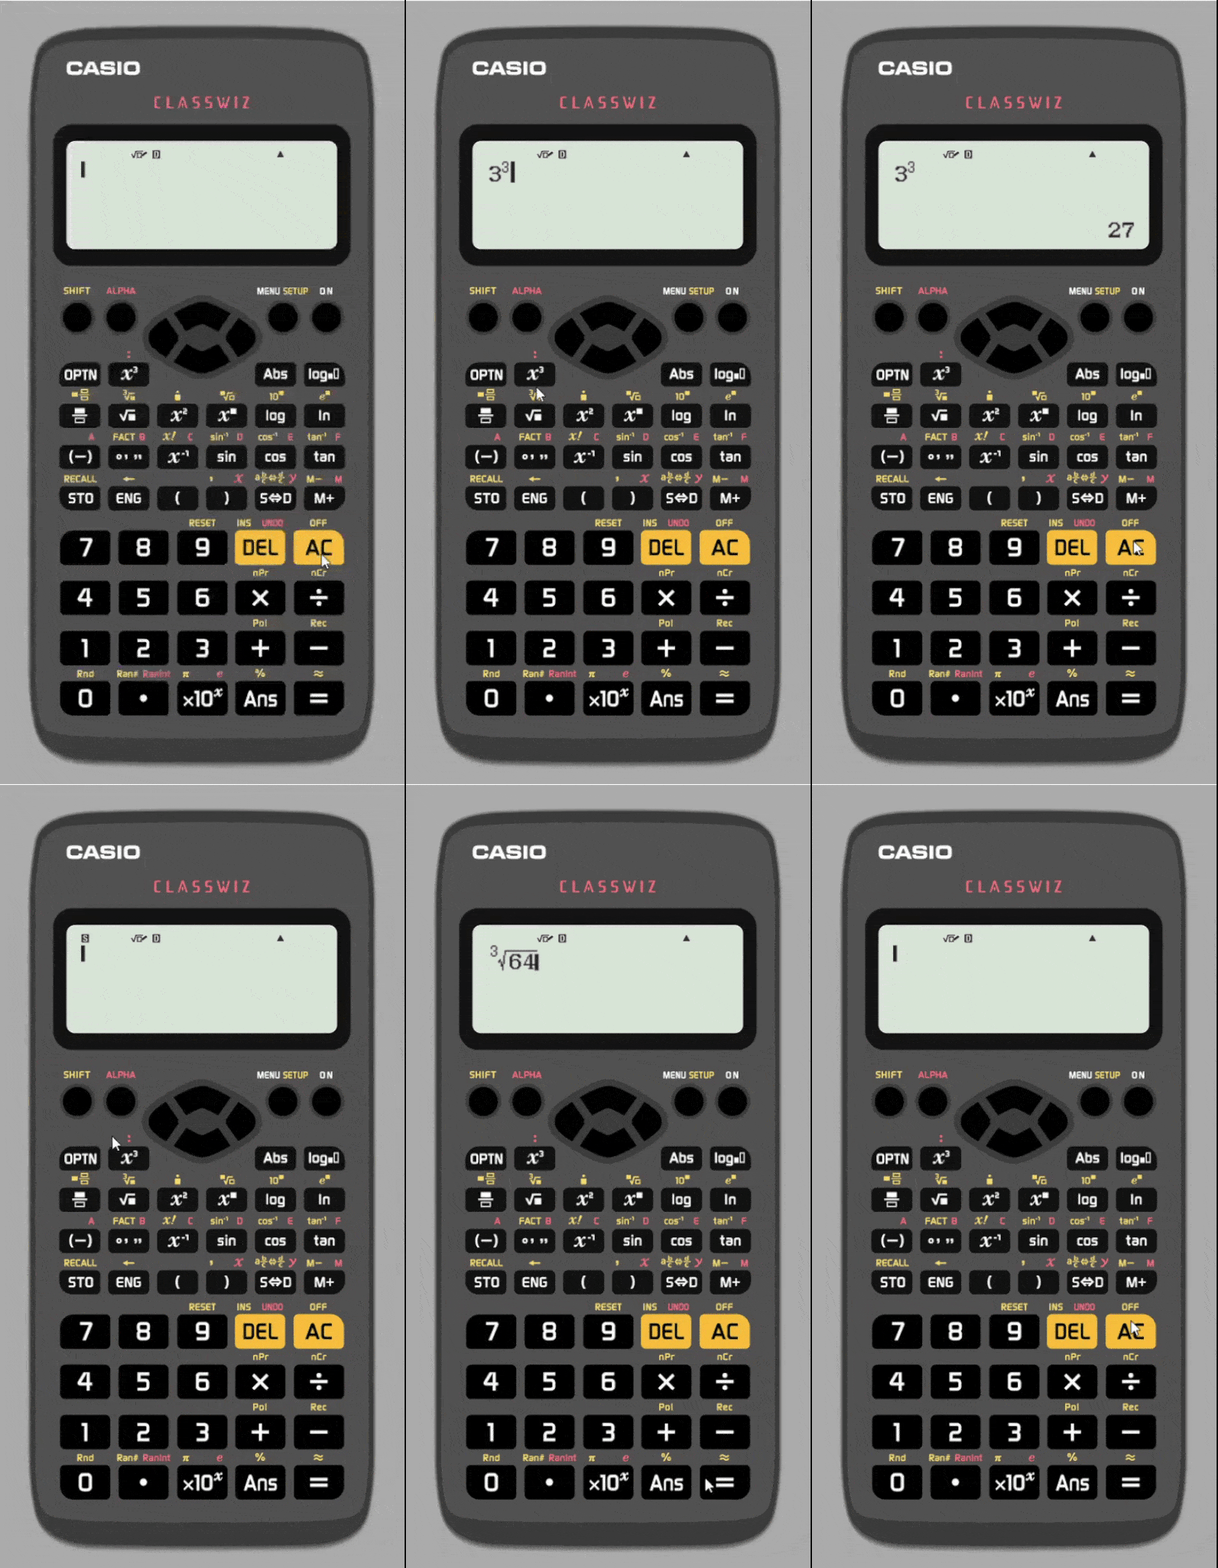

Cube numbers are similar to square numbers, except to cube a number we multiply it by itself and then by itself again. Cube roots do the reverse process and tell us what number must be cubed to give us the number we entered.
Cubing numbers and finding the cube root of a number are very similar to square numbers and square roots:
To cube a number, we use the \color{black}{x^3} button. This will insert a superscript \color{black}{^3} directly after the number that appears in the display. Pressing \color{black}= will perform the ‘cube’ operation.
To cube root a number, we can use the \color{black}{\sqrt[3]{\square}} button. On our calculator, this can be accessed by activating the SHIFT key, then pressing the square root symbol (\color{black}{\sqrt{\square}}). Pressing the button allows you to type a number underneath the cube root symbol. Pressing \color{black}= will perform the ‘cube root’ operation on the number you type in.
In the example on the right, we perform two calculations:
- First, we perform the calculation \color{black}{3^3=} which gives an answer of \color{black}27
- Next, we perform the calculation \color{black}{\sqrt[3]{64} =} which gives an answer of \color{black}4
Note:
You can use the \color{black}{x^{\square}} and \color{black}{\sqrt[\blacksquare]{\square}} buttons to manually enter a power or a root other than a square-root or a cube-root. However, you are unlikely to see these at KS3.
Skill 4: Brackets and Fractions
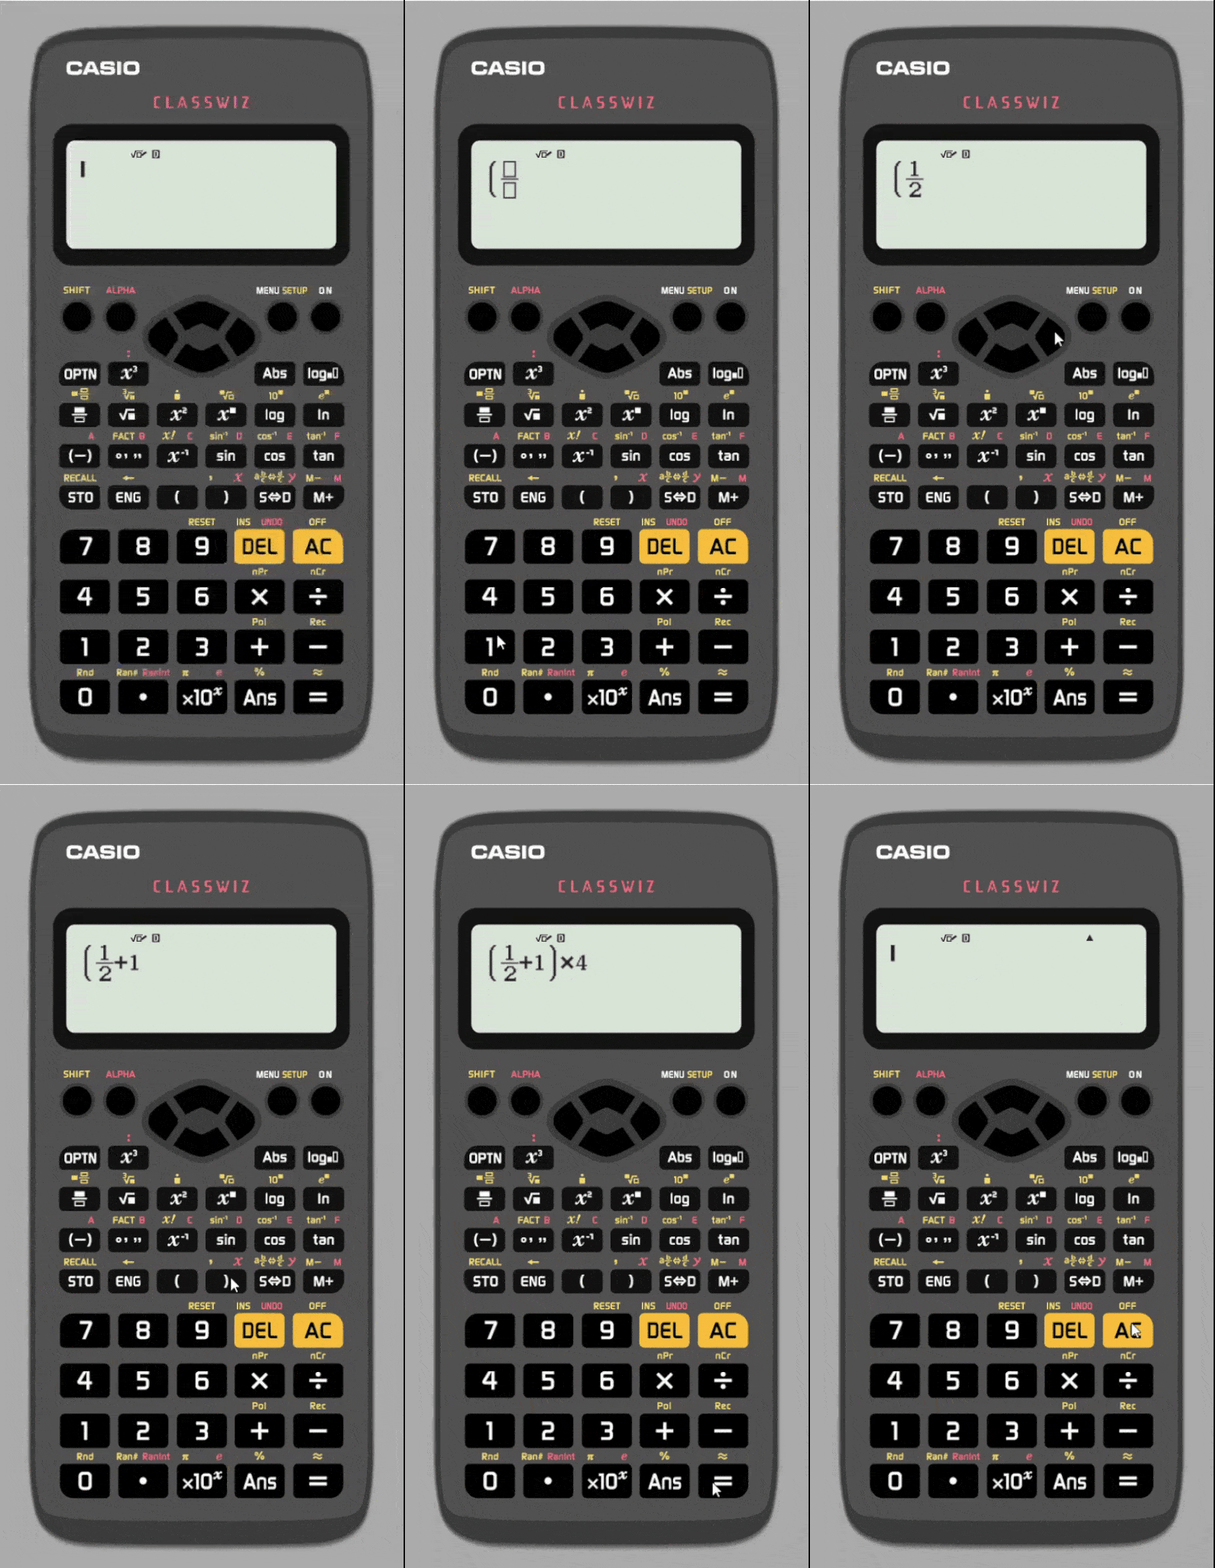

We can perform calculations involving brackets on a scientific calculator. The calculator will follow the rules of BIDMAS, so it will calculate anything inside the brackets first. This makes performing long sums quite simple. There are two bracket keys, which look like \color{black}( and \color{black}).
We can also input fractions directly into the calculator using the \color{black}{\dfrac{\blacksquare}{\square}} button. You can navigate between the top and bottom of the fraction using the up and down arrow keys. The left and right arrow keys can be used to navigate through the display to enter the rest of your calculation.
In the example on the right, we perform the calculation \color{black}{\bigg(\dfrac{1}{2} + 1 \bigg) \times 4 =} which gives an answer of \color{black}6.
Skill 5: Using the ‘Ans’ Button
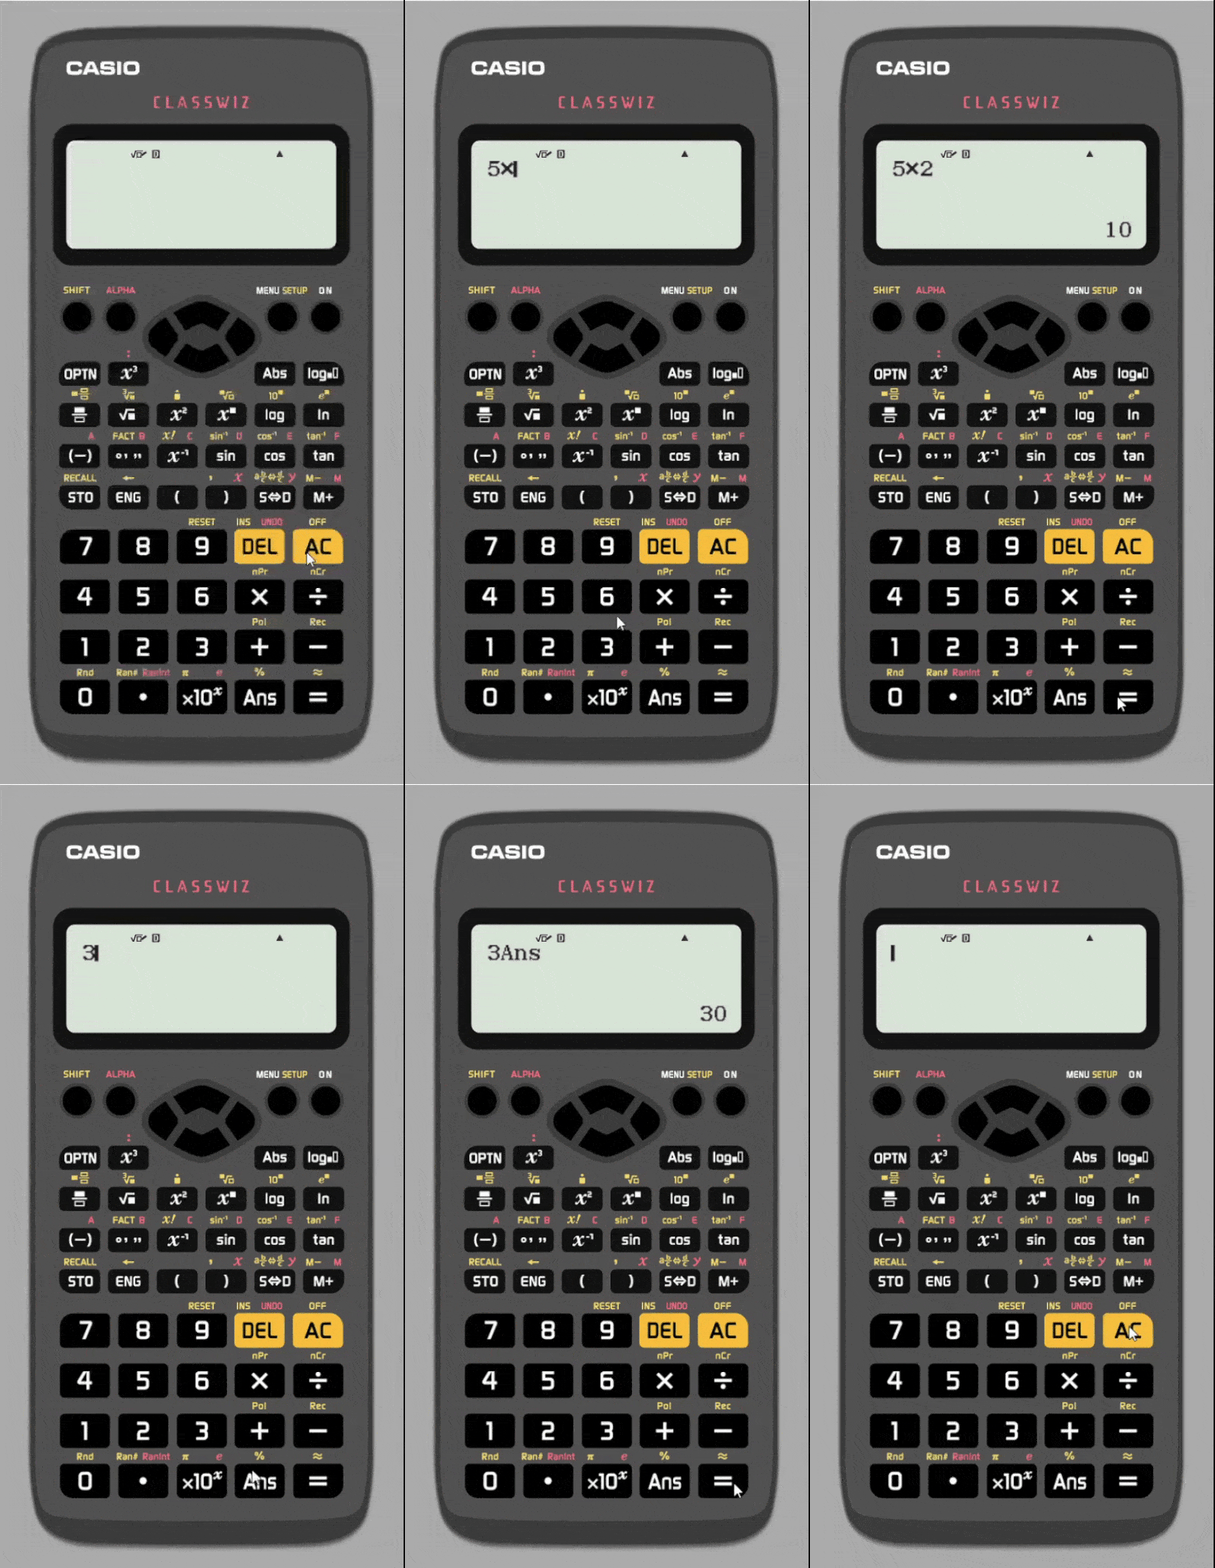

Your calculator stores the answer to your most recent calculation. Their are two ways you can recall the stored answer:
- Enter an operation, such as \color{black}\times or \color{black}+ straight after pressing \color{black}=
- This will automatically begin a new calculation beginning with the previous answer
- Using the \color{black}{\text{Ans}} button
- This will allow you to enter the stored value at any point in a calculation
In the example on the right, we perform the calculation \color{black}{5\times2=} which gives an answer of \color{black}10. We then enter the calculation \color{black}{3\text{Ans}}, using the stored value of \color{black}{10}, giving us \color{black}{3\times10=30}.
Using the \color{black}{\text{Ans}} key is particularly useful when you have a long calculation, or when you need to substitute your answer into a formula.
Skill 6: Storing Values in the Calculator
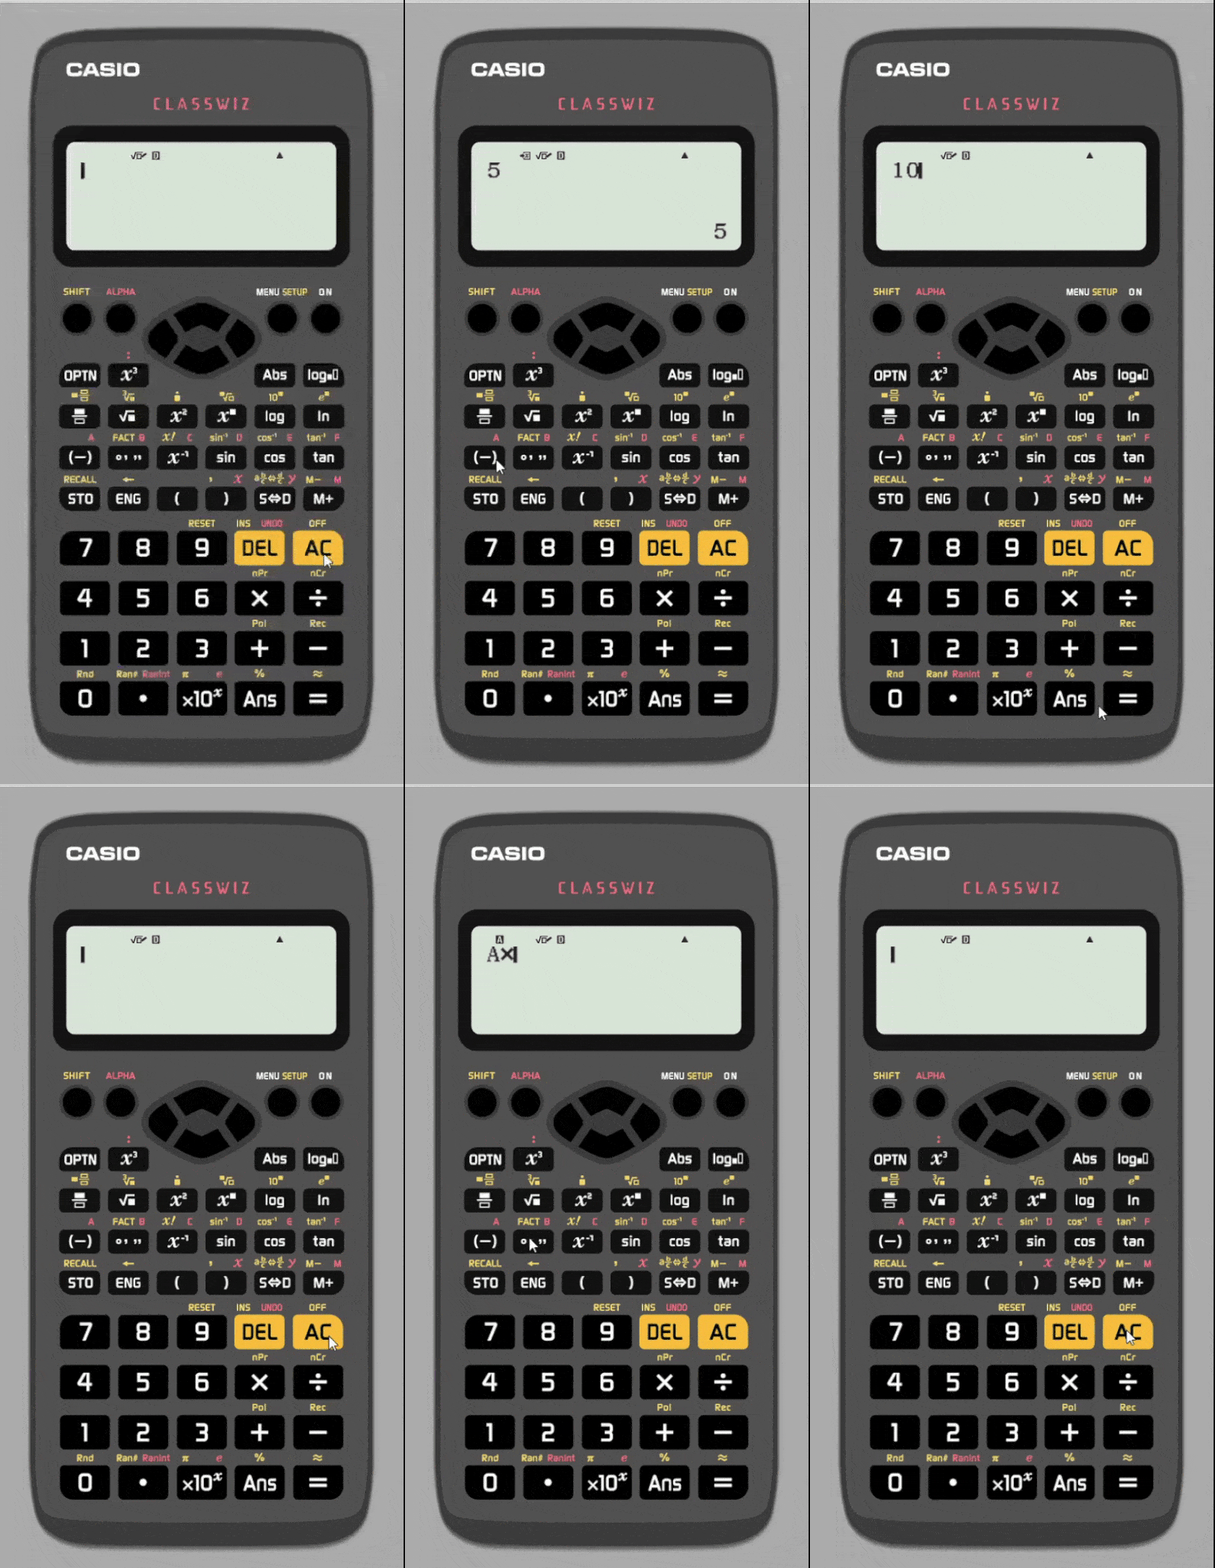

One of less well-known but very useful features of a scientific calculator is the ability to store multiple answers. You can then recall these answers at any time – most models will even keep the stored values after the calculator is switched off!
On our calculator on the right, after pressing \color{black}= we use the \color{black}{\text{STO}} button, then press one of the keys with a small letter above (e.g. A). This will store the answer in the calculator, which can then be accessed using the ALPHA key and then pressing the key with the stored value.
In the example on the right, we stored an answer of \color{black}{5} as A and an answer of \color{black}{10} as B.
We then perform the calculation A \color{black}\times B\, \color{black}= which gives us \color{black}{5\times10=50}
You may need to practice this skill several times to get the hang of it but it is incredibly useful, especially when you have values that you don’t want to round until the end of your calculations.
Note that your calculator may have a slightly different process for storing values, but it will probably be similar to ours.
Skill 7: Standard Form

When we are dealing with very large or very small numbers, we often use standard form. As a quick reminder, standard form looks like:
\color{red}{A}\color{black}{\times10}\color{green}{^n}
Where \color{red}A is a number between 1 and 10 and \color{green}{n} is the number of places the decimal point moves.
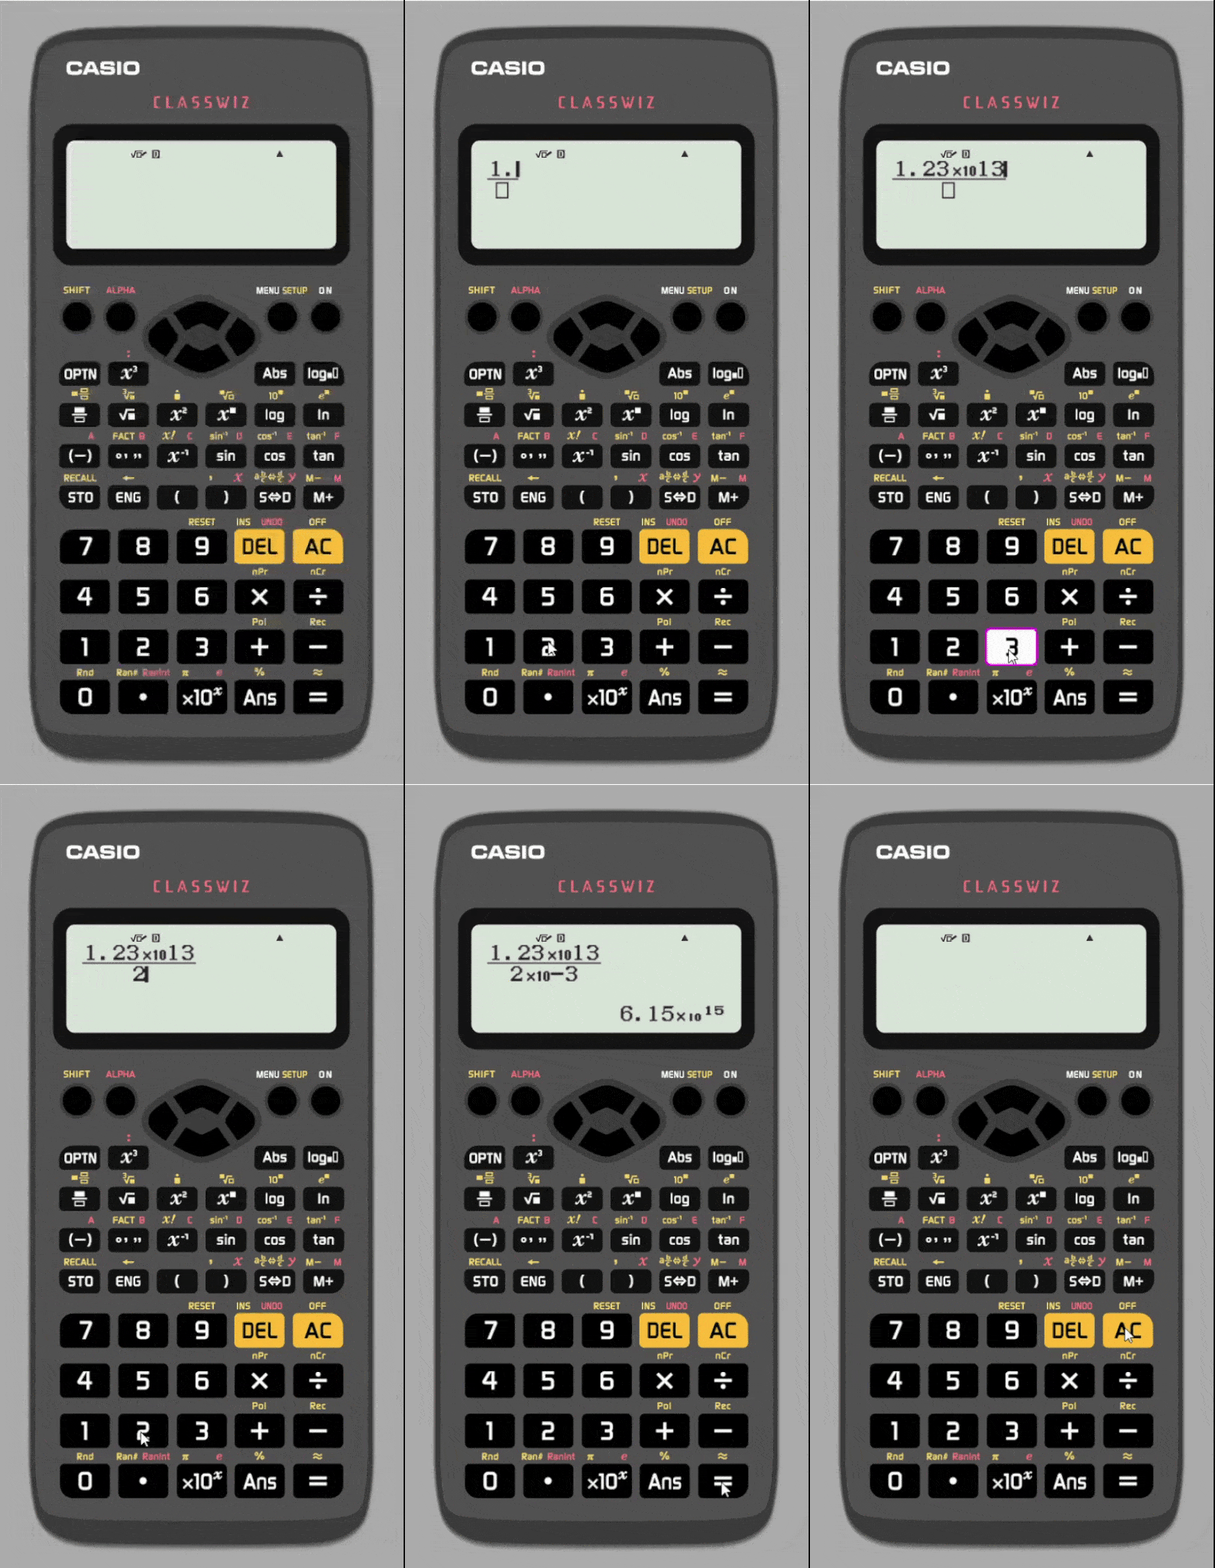
You could enter a number in standard form manually by individually typing out the expression using the \color{black}{x^{\square}} key, but this is tedious and you could make a mistake. Luckily, there is an easy way to enter standard form on a calculator, using the \color{black}\times10^x button, which does all the fiddly stuff for us so we only have to enter the value of \color{green}{n}.
In the example on the right, we perform the calculation \color{black}{\dfrac{1.23\times10^{13}}{2\times10^{-3}}=}
This gives us an answer of \color{black}{6.15\times10^{15}}
Note that you only have to input the value of \color{green}{n} after pressing the \color{black}\times10^x button (you don’t need to try to raise 10 to the power of n as all this is done for you).


